
Janesville Epoxy Flooring installs ESD flooring in Janesville, WI, serving surrounding cities including Milton, Edgerton, Beloit, South Beloit and Evansville. Electrostatic discharge can damage sensitive electronics without leaving a visible mark, and an ESD floor gives that charge a controlled path to ground. With more than 20 years of concrete coating behind us, we build static-dissipative and conductive epoxy systems that perform to the resistance range your program specifies.
An ESD floor is not just a gray epoxy with a special label. It is a layered system of conductive primer, grounding connections and a carefully formulated topcoat, and every layer has to be installed correctly for the floor to test within range. The slab still comes first: grinding, repair and moisture testing are in every scope.
Our proposal names the ESD system, the grounding layout, the finished thickness and the target resistance range, and we test the floor once it cures. That way your quality team receives a documented baseline rather than a promise. Here is how ESD floors work and how we install them.
What an ESD Floor Does
Static-Dissipative and Conductive Systems
Every ESD floor drains static charge to ground, but systems differ in how quickly they do it. Conductive floors have lower resistance and move charge away fast, while static-dissipative floors have higher resistance and release it more gradually. Each sits within a defined resistance range.
Which one you need depends on the parts and processes you protect, and on the range your ESD control program, customer or equipment maker sets. We work from that specification rather than choosing a product first and hoping it fits.
Where ESD Flooring Is Needed
Electronics assembly and repair areas, server and data rooms, laboratories, clean manufacturing spaces and some medical and testing facilities all use ESD floors. Areas handling flammable vapors or sensitive explosives may also require static control. In each case, the floor reduces the chance that a charge builds up on people and equipment moving across it.
We ask what happens in each room before recommending a system. A packaging area and a component assembly line in the same building may need different approaches.
The Floor as Part of a Grounded System
An ESD floor only works when people and equipment connect to it. Workers need ESD footwear or heel grounders, and carts, chairs and workstations need their own conductive paths. A person in ordinary rubber-soled shoes stays insulated from even a perfect floor.
We coordinate with your ESD coordinator or facility manager so the floor fits the rest of the program. That includes where grounding points will be placed relative to workstations.
How We Install an ESD Floor
Preparing and Testing the Slab
We diamond grind or shot blast the slab to the profile the ESD system requires, removing old coatings, sealers and contamination. We do not acid etch. Cracks are repaired and ground flush, and joints are filled where carts cross them.
Moisture testing is part of the scope, because moisture rising through a slab can cause adhesion problems under any coating. Where readings call for it, a compatible moisture-mitigation primer is used beneath the ESD layers.
Conductive Primer and Grounding Points
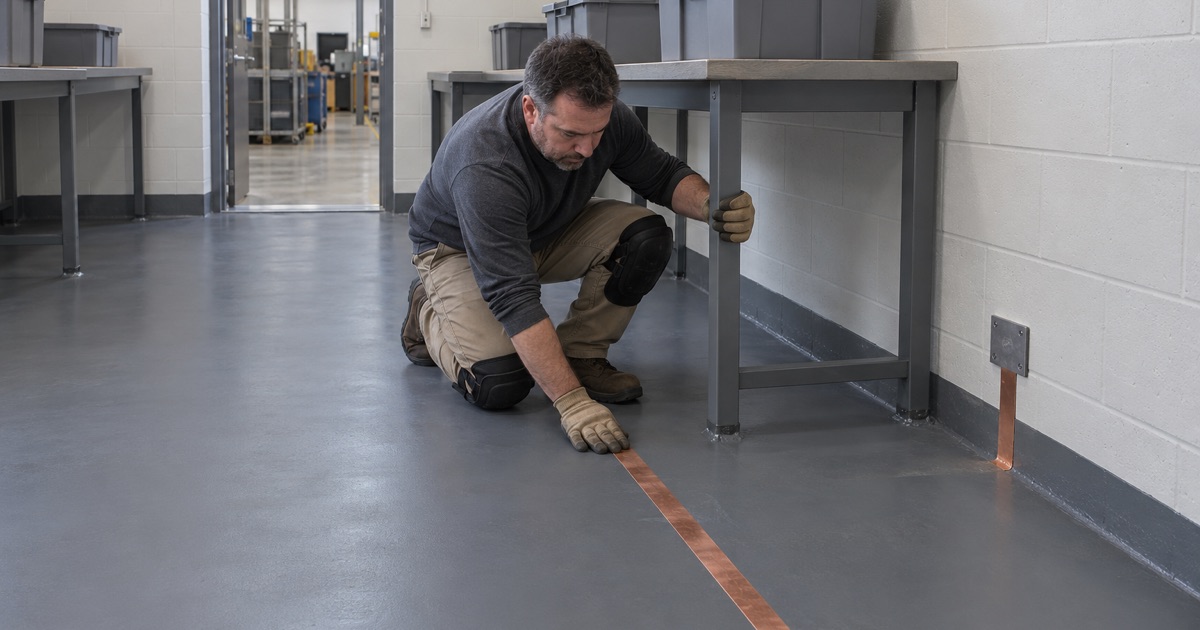
A conductive primer goes down first, creating a continuous layer that carries charge across the floor. Copper grounding strips are laid at planned intervals and connected to building ground points by an electrician, so the charge has somewhere to go. The layout depends on the room size and the system manufacturer’s instructions.
The grounding plan is drawn into the proposal. Each connection is checked before the topcoat goes on, because it cannot be reached easily afterward.
The ESD Epoxy Topcoat
The topcoat contains conductive materials that let charge pass from the surface to the primer below. It must be applied at the specified thickness, since too thick or too thin a layer can move the floor out of range. We measure and control each batch carefully.
ESD topcoats come in a limited range of colors and finishes. We help you choose one that suits the space, and add safety striping or zone marking where your layout calls for it.
Testing and Caring for an ESD Floor
Resistance Testing After Cure
Once the floor cures, we test resistance point to point across the surface and from the surface to ground, using a calibrated meter and electrodes. Testing follows the method your program references, such as ANSI/ESD STM7.1. The readings are recorded at mapped locations.
You receive those results as a baseline for your own periodic checks. If any area falls outside range, we correct it before handing the floor over. Resistance readings can drift with humidity, cleaning products and wear, so we recommend your team retest on the schedule your program sets and compare each round against that first map.
Cleaning Without Insulating the Floor
Many everyday floor finishes, waxes and some cleaners leave an insulating film that can raise the floor’s resistance. Clean ESD floors with a neutral cleaner approved for static-control flooring, and avoid wax or polish. Regular dust mopping keeps dirt from building up.
We provide written care instructions at handoff. Following them keeps the floor in range long after installation.
Scheduling and Compliance
ESD areas are usually part of working production, so we schedule installation around shifts, including overnight and weekend windows. Work is phased where only part of a line can stop at a time. Products are selected to meet Wisconsin and Illinois VOC rules, including Illinois limits that bind the applicator.
Grinding dust is captured at the machine and slurry is collected on site. That keeps nearby sensitive equipment and the rest of the facility clean.
- 20+ Years in Concrete Coatings
- Moisture Testing in Every Scope
- Free Written Estimates